This post may contain affiliate links This means that if you click and purchase, I may receive a small commission at no extra cost to you.
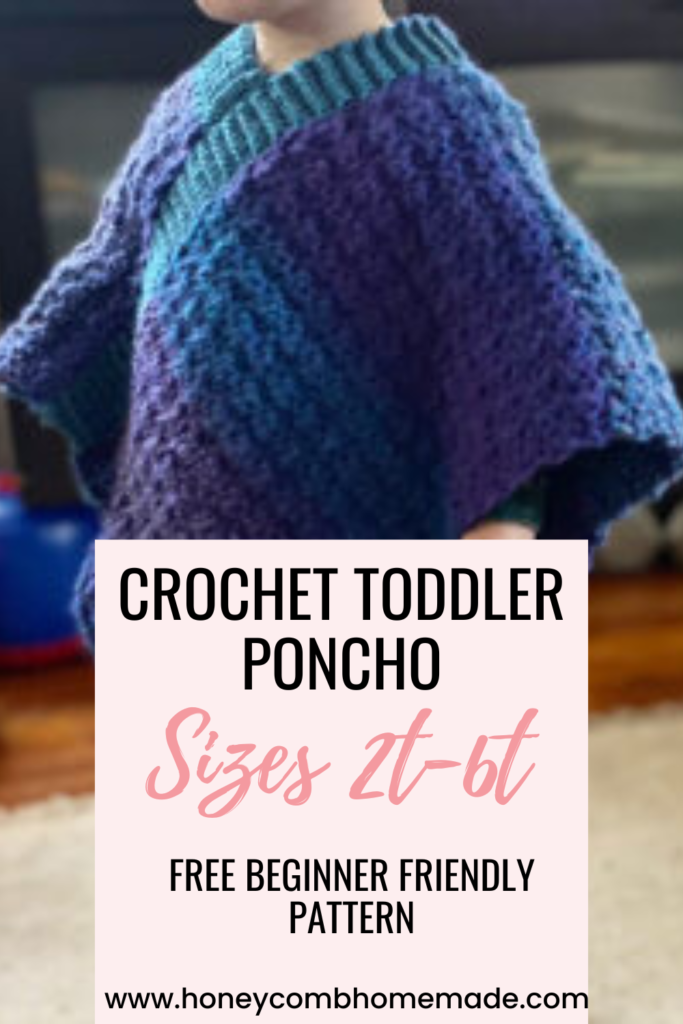
I’m so excited about this toddler poncho! This is the first pattern I have ever size graded. Exploring the design process has been such a fun experience for me I hope you all enjoy the pattern!
Please let me know if you make this pattern, tag me in photos on Instagram. I will be so happy.
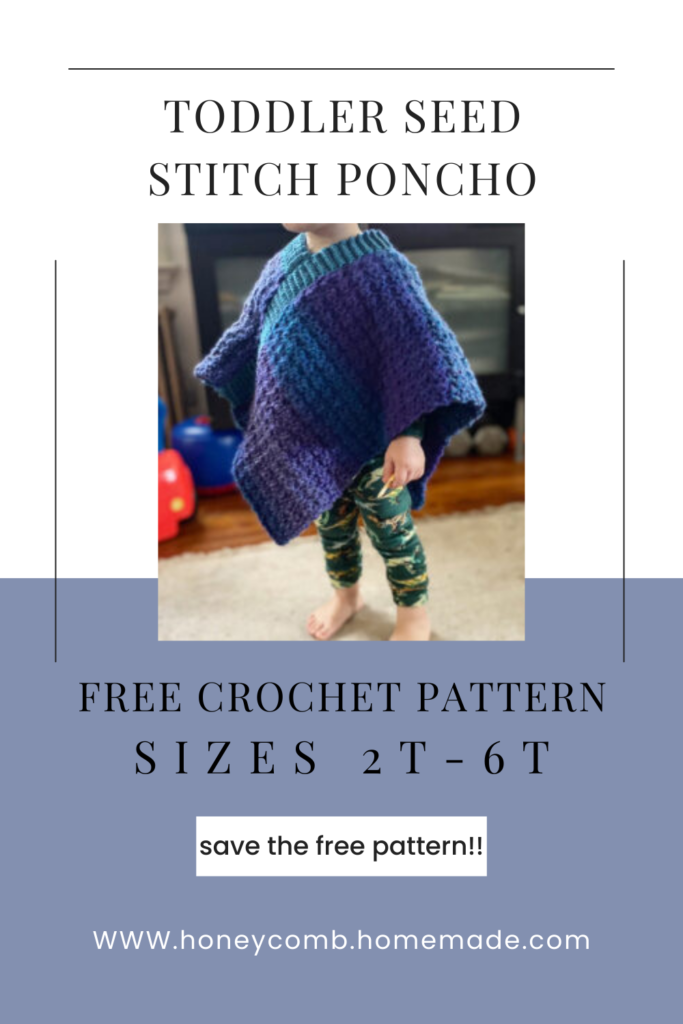
My toddler also loves this poncho and he’ll actually keep it on himself.
Throughout making this pattern I didn’t even know if it was going to work. I wanted something different than what I’ve been seeing for children’s poncho’s which is mostly granny square style ponchos. Those are awesome, One of my favorite things to make is a granny square. But I really wanted something without all the holes that was a little thicker for the colder season and also something that draped well.
My favorite stitch right now is the seed stitch. I recently made a tutorial for it which you can find here. I knew I was going to be coming out with this pattern and wanted to cover all the skills used in it!
I’m hoping that I’ve made this simple enough that beginners can make this!
The project itself only took 2 days to actually crochet once all the pattern working and frogging was done.
Materials
Weight 4 yarn for the ribbing I used *Affiliate link* Lion brand basic stitch yarn in stonewash
Weight 5 yarn for the seed stitch.*Affiliate link* I used Premier puzzle yarn in riddle.
Crochet hook size H and K
Tapestry needle
Scissors
This is a Crochet hook set that comes with the tapestry needles and lots of hooks. *Affiliate link* Hook set.
How to measure your toddler poncho
The best way to measure for sizing is to measure from the shoulder across the torso to the other side of the hip. Since it is a poncho its okay if its more oversized rather than undersized. You’ll notice for a few sizes that even though my gauge was one measure, the stitches are a tiny bit different to match up with the pattern of 2+1 for the stitch. I always chose to go up one instead of down one.
Of course if your making this for a friend, gift, or any other purpose that you can’t directly measure the person this is for, I’ve put rough measurements for size and number of stitches.
Gauge
I made this crochet toddler poncho with a bulky weight yarn and medium weight yarn. Although I’m giving my gauge until this pattern is tested more I’d recommend making sure that each one of your squares is the correct amount of inches in width and length. Different yarns even between weight 5 and 4 can be completely different.
Seed stitch rectangles using weight 5 yarn: 6stitches=2 inches
5 rows for 2 inches.
Stretch rows using weight 4 yarn: 8 stitches=2 inches
8 rows= 2 inches
How this pattern is made
This toddler poncho is made in 4 pieces and sewn together. One large rectangle and one shorter one. Two ribbed pieces one being longer and one being short.
Basic measurements
From shoulder to opposite hip
2T: 16in
3T: 16.50in
4T: 17in
5T: 18in
6T: 18.5
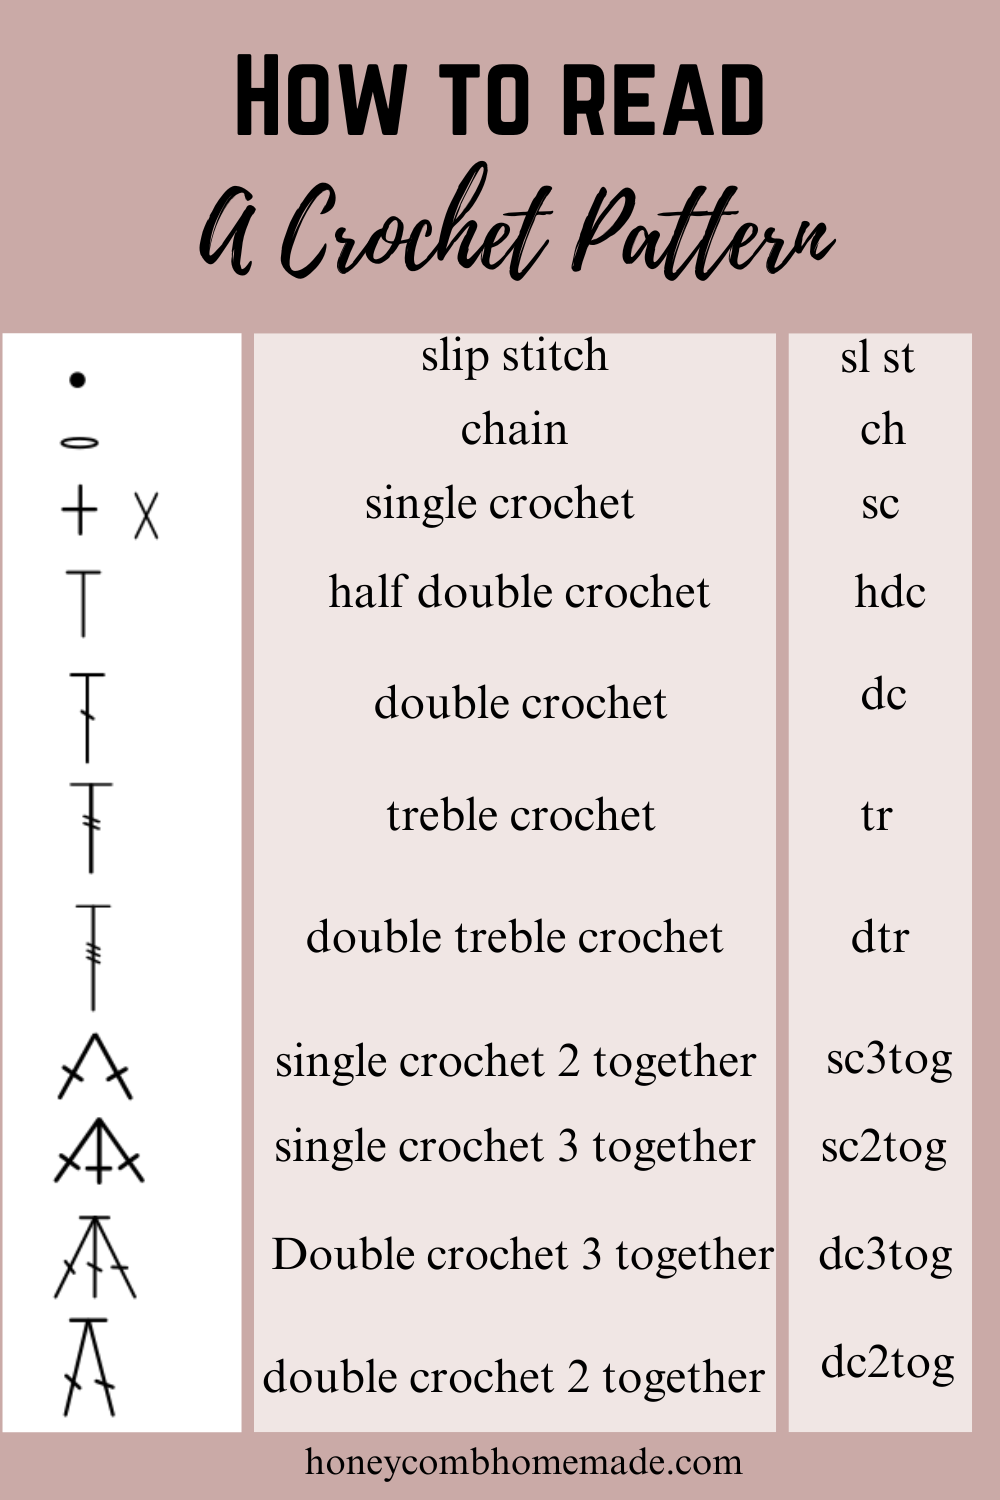
Abbreviations
Ch: Chain
Sc: Single Crochet
Dc: Double Crochet
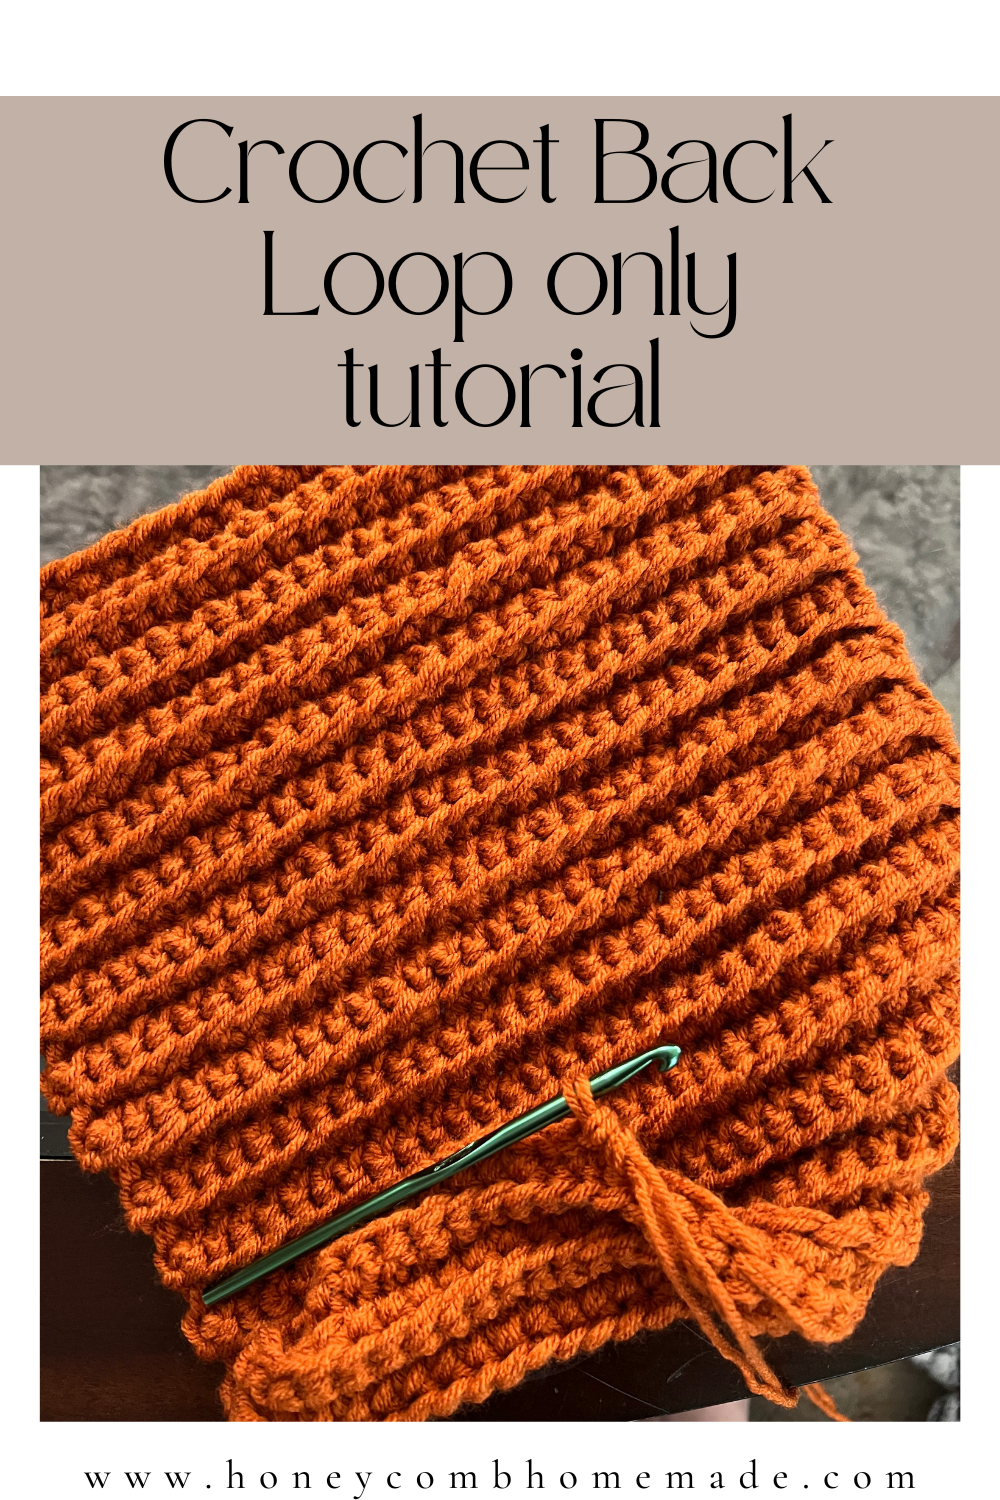
Blo: Back loop only
Instructions
The ribbing
Using a H size hook
- Ch 8+1 sc in the blo until ribbing measures 32(33, 34, 36, 37) inches. This is your longest piece of ribbing
- Ch 8+1 sc in the blo until the ribbing measures 7(7,7,8,8) inches. This is your shortest piece of ribbing
Large rectangle
- Using a K sized hook, Chain 28(30, 32, 34, 36)+1 Your width measurement should equal roughly 10.5(11, 11.5, 12, 12.5)inches
For the purpose of this pattern if you are slightly off it is not a big deal. The fabric stretches and as long as you aren’t inches off you should be able to sew your pieces together with little problems.
Sc into the second chain from the hook, double crochet, single crochet across ending on a double crochet.
Chain one and turn. Sc into the last stitch of the 1st row, double crochet single crochet across. You should always end on a double crochet.
This is called the seed stitch. If you would like a more in depth tutorial with photos and video, I have a tutorial here.
Keep working in this pattern until this rectangle is 32(33, 34, 36, 37) Inches long.
You should have approximately 80(83, 85,90,93) rows to achieve this.
Smaller rectangle
Using a size K hook, Chain the same number you did for the first rectangle. 28(30, 32, 34, 36) +1 work the seed stitch until your rectangle measures 7(7, 7, 8, 8) inches.
Approximately 21( 21, 21, 23,23) Rows.
Sewing together your toddler poncho!
Sew together your longest ribbed piece and longest rectangle. They should both be the same size. At this point your going to choose what side is the right side and the wrong side. Make sure that all of your seams are on the wrong side.
Sew together the shortest ribbed piece to the shortest rectangle.
Now you have 2 pieces.
Fold the large rectangle in half.
Fold the short rectangle in half.
Position the large rectangle on a diagonal on a table or flat surface. You should be able to see where the other smaller rectangle (also folded) sits and fits together on the opposite shoulder.
Making sure you give enough room the neck. I would recommend counting the ridges of your ribbing on the long piece. Start sewing the other ribbing to the long ribbing at the 11th ridge from the folded shoulder.
You want to make sure the sides are all even before sewing.
Voila! Just sew in all your ends and your finished! This poncho took me about 2 days to crochet up, I hope you love the pattern. Please post a picture if you make this pattern I’d love to see it!
Happy crocheting!

Hello! Are the measurements in the ribbing instructions in rows or inches?
Hey! the measurements are in inches. I updated the pattern to be clearer. The ribbing should be the same number of inches as both of your rectangles 🙂 hope that helps!